
🌸 EXCLUSIVE EASTER RELEASE: Floppy-Eared Ball Bunny Pattern! 🐰
Handcrafted with love, just like Mom 💝
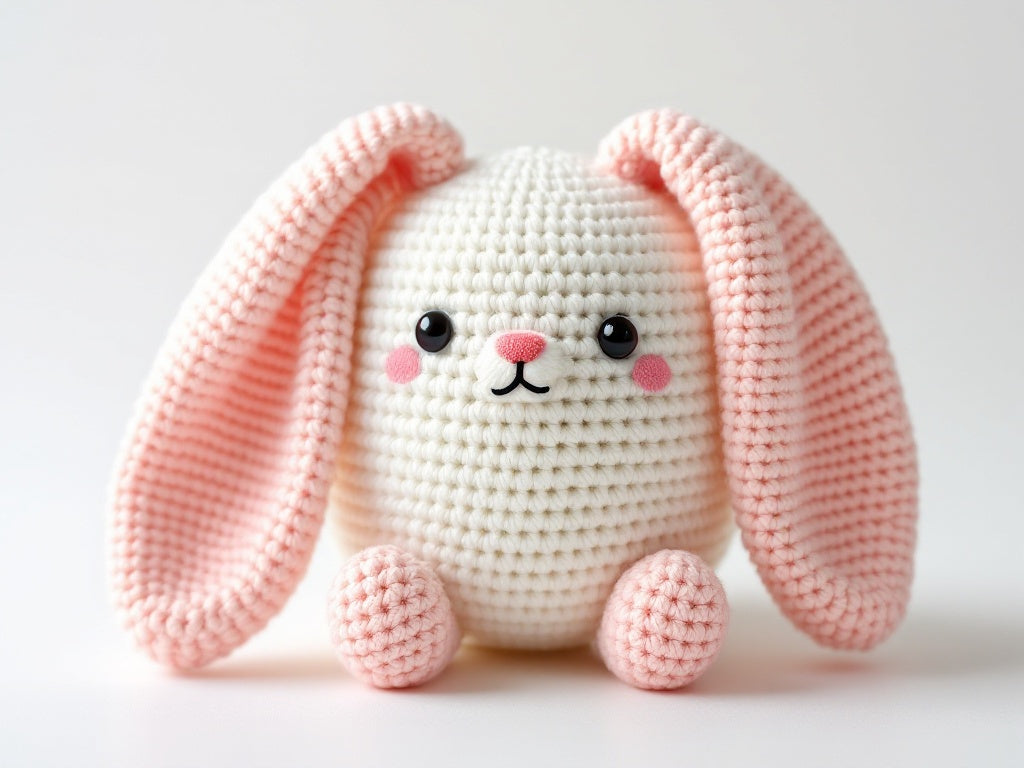
Welcome to our newest pattern release! This adorable Floppy-Eared Ball Bunny is perfect for Easter decor or as a year-round companion. Our detailed pattern includes step-by-step photos to guide you through the creation process.
📏 PROJECT DETAILS
- Skill Level: Intermediate
- Finished Size: Approximately 5" tall
- Time: 2-3 hours
- Pattern Type: Amigurumi
🎯 PART 1: GETTING STARTED
Materials Checklist:
- ✓ Velvet/chenille yarn (recommended: weight 4-5)
- Main color (white/cream) - 100g
- Accent color (pink) - 50g
- ✓ Crochet hooks
- 5mm for body
- 5.5mm for ears
- ✓ Safety eyes (12mm)
- ✓ Stuffing
- ✓ Stitch markers
- ✓ Tapestry needle
- ✓ Blocking materials (pins, spray bottle)

📝 ABBREVIATIONS
- sc = single crochet
- hdc = half double crochet
- inc = increase
- dec = decrease
- st(s) = stitch(es)
- [ ] = repeat instructions
🧶 PART 2: BODY CONSTRUCTION
Round-by-Round Guide:
- Magic ring with 6 sc
- Increase rounds (follow stitch counts carefully)
- Place safety eyes between rounds 12-13
- Start stuffing at round 15
- Decrease rounds to close
Main Body Instructions:
- Round 1: 6 sc in magic ring (6)
- Round 2: [inc] around (12)
- Round 3: [sc, inc] around (18)
- Round 4: [sc 2, inc] around (24)
- Round 5: [sc 3, inc] around (30)
- Round 6-15: sc in each st (30)
- Round 16: [sc 3, dec] around (24)
- Round 17: [sc 2, dec] around (18)
- Insert safety eyes between rounds 12-13
- Start stuffing firmly
- Round 18: [sc, dec] around (12)
- Round 19: [dec] around (6)
- Fasten off, weave in end
👂 PART 3: EAR CREATION
Key Points:
- Use larger hook (5.5mm)
- Create texture with sc/hdc combinations
- Don't stuff ears
- Make folds while damp
- Block for 24 hours

Ears (Make 2):
- Round 1: 6 sc in magic ring (6)
- Round 2: [inc] around (12)
- Round 3: [sc, inc] around (18)
- Round 4-6: sc in each st (18)
- Round 7-9: sc in 2 sts, hdc in next st repeat around (18)
- Round 10: hdc in each st (18)
- Round 11-13: sc in each st (18)
- Round 14: sc in 2 sts, hdc in next st repeat around (18)
- Round 15-17: sc in each st (18)
- Round 18: [sc2tog, sc] around (12)
- Do not stuff ears
🎀 FINISHING TOUCHES
Blocking Ears:
- Lightly dampen ears with water spray
- Lay flat on blocking mat
- Create 3 gentle folds:
- First fold: 1/3 from top
- Second fold: 2/3 from top
- Third fold: Near base
- Pin folds in place
- Let dry completely (24 hours)
Assembly:
- Position ears on top of head, slightly angled outward
- Sew base of ears securely using mattress stitch
- Create small tacking stitches at folds if needed
- Optional: Add pink blush to cheeks using yarn or felt
👕 CARE INSTRUCTIONS
- Hand wash only
- Air dry flat
- Do not iron
- Store in cool, dry place
✨ SPECIAL OFFER!
Subscribe to our newsletter and get:
- 20% off your first purchase
- Early access to new patterns
- Exclusive crafting tips
We accept: American Express, Apple Pay, Diners Club, Discover, Google Pay, Mastercard, PayPal, Shop Pay, Venmo, and Visa